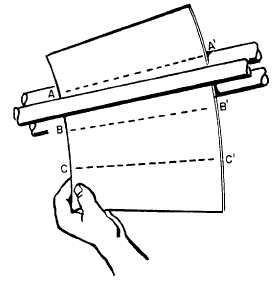
Figure 13-39—Rolling a conical shape.
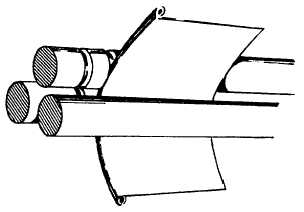
Figure 13-40.—Rolling a wired edge.
7. Turn the partially formed sheet end over end,
and again pass it through the rolls.
8. Continue turning the sheet end over end and
passing it through the rolls, each time adjusting the
rear roll for a new radius, until a cylindrical shape has
been formed.
9. Remove the cylinder from the machine. The
top front roll has a quick-releasing device on one end.
This allows the released end of the roll to be raised
and the newly formed cylinder slipped off just as you
would slip a ring from your finger.
Conical shapes can be formed by setting the back
roll at an angle before running the sheet through it, or
they can be made with the rolls parallel. See
figure 13-39. To make a cone with the rolls parallel,
the sheet must be fed through the rolls in such a
manner that the element lines (A-A’, B-B’, etc., in the
illustration) pass over the rear roll in a line parallel to
the roll. This involves slipping the large end of the
cone through the rolls at a slightly faster rate than the
rate at which the small end is being rolled through.
The grooves at the ends of the rolls can be used to
form circles of wire or rod. They can also be used to
roll wired edges, as shown in figure 13-40.
Rotary Forming
The roll dies, shown in figure 13-41, are installed
on the rotary machine to perform a specific forming
operation. In the following paragraphs we will
discuss their functions.
Figure 13-41.—Roll dies used on a rotary machine.
13-25