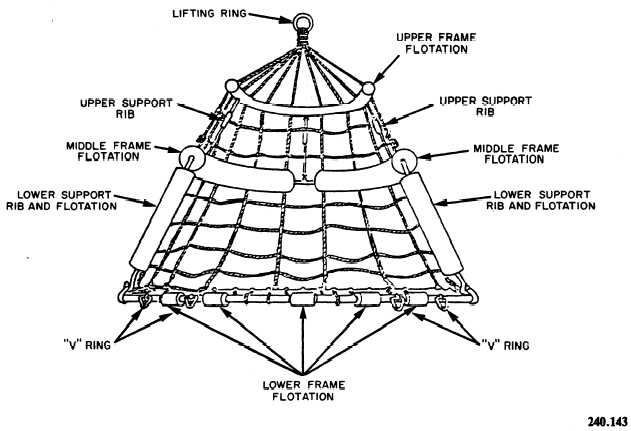
the net, along with locking support rods. These
rods incorporate sliding sleeves to prevent the net
from collapsing while it is occupied. At the front
of the net are two additional support rods that
can be disconnected from the top section when
it is stored. When in use, the rescue net tilts away
from its open side. This design helps prevent
survivors from falling out (fig. 5-35).
The following is a step-by-step procedure for
the survivor to safely board the rescue net:
1. When the net enters the water, swim to the
net and position the net with its opening directly
in front of you. Grasp each of the lower support
rib floats (fig. 5-36).
2. Pull yourself into the net and turn so you
are facing the opening.
3. Move all the way to the back of the net with
your back resting against the rear of the net and
your arms and legs completely inside. Give a
thumbs-up hand signal to the hoist operator and
maintain a secure handhold during the hoist.
Rescue Net (Swimmer-Assisted,
Single Rescue)
During swimmer-assisted rescues using the
rescue net, the swimmer uses the following
procedure to assist the survivor:
1. Places the rescue net opening directly in
front of the survivor without disconnecting it from
the rescue hook.
2. Places the survivor in a collar/equipment
tow and swims into the rescue net backwards while
positioning the survivor on either side of the net,
facing out.
3. Ensures the survivor is completely inside
the net.
W A R N I N G
The survivor must not attempt to get
out of the rescue net until directed by the
crewman.
Figure 5-35.—Rescue net.
5-26


