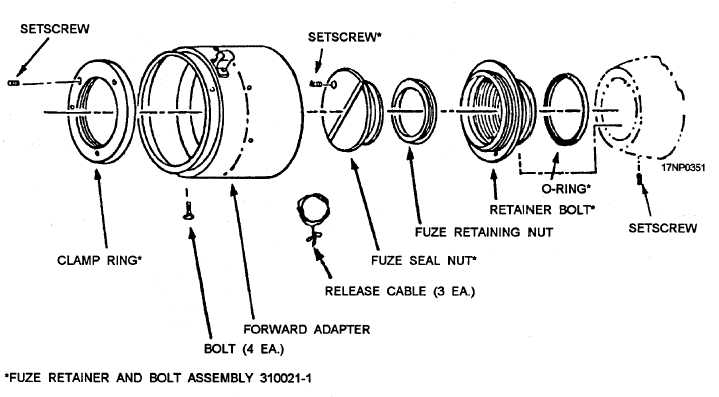
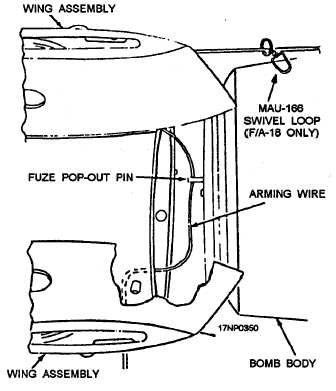
Figure 12-19.—Arming wire installation.
9. Remove the access cover, ensure that no kinks
are in the arming wire, and that the wire is not looped
around pull-out pin (fig. 13-19).
10. Secure access cover.
11. Wrap arming wire around wing assembly.
12. Mark wing assembly with type of fuze and date
installed, fuze safety pin removed, and current date and
QA initials.
Forward Adapter Assembly
Installation
Install forward adapter assembly (fig. 13-20) on
nose of bomb as follows:
1. Place O-ring on external threads of retainer
bolt.
2. Install retainer bolt into nose fuze well (fig.
13-21).
3. Torque retainer bolt to specified torque by
using wrench adapter (fig. 13-21).
4. Apply specified torque to setscrew in nose fuze
well (fig. 13-21).
5. Install fuze seal nut in retainer bolt and tighten
(fig. 13-21) setscrew.
6. Place open end of forward adapter over nose
bomb body. Align arming wire guide with suspension
lugs on bomb body.
Figure 13-20.—Forward adapter assembly with fuze retaining bolt.
13-20


