
Figure 10-5.--Hose assembly identification tags.
remain between the tag and the end fitting after proof
intermediate, and shipping containers containing a
pressure testing has been performed.
single item. Exterior shipping containers that contain
major assemblies made up of two or more assemblies
Use labels (fig. 10-6) to identify hose assemblies
with rubber items are identified by the oldest assembly
located in areas where a tag may be drawn into an
in the container.
engine intake or where hose assemblies are covered
with heat-shrinkable tubing. Place the label 1 inch from
Commercially manufactured Teflon hose assem-
the socket and apply a 2 1/2-inch piece of clear,
blies are identified by a permanently marked and
heat-shrinkable tubing, MIL-R-46846, type V, over the
attached band on the assembly. The band contains the
label and hose. Function and hazard labels can be
assembly manufacturer's name or trademark; hose
applied in the same manner.
manufacturer's federal supply code number; hose
assembly part number; operating pressure-in psi,
HOSE FABRICATION
pressure test symbol (PT), and the date of hose
assembly manufacture (in month and year).
Fabricating hose assemblies from bulk hose and
reusable end fittings requires some basic skills and a
Locally Fabricated
few hand tools. The skills required are the ability to
follow step-by-step instructions and to use the required
Hose assemblies manufactured by depot and
hand tools.
intermediate maintenance activities are identified with
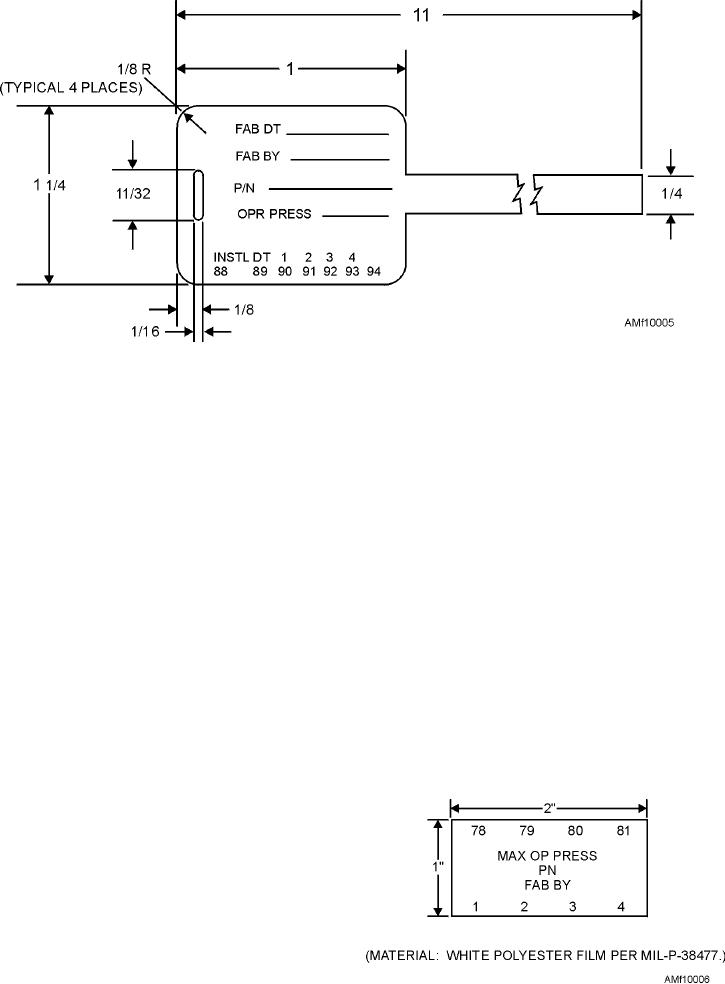
hose assembly identification tags or labels. The hose
assembly identification tag is a metal tag that contains
the basic hose assembly and part number, date of
fabrication (in quarter and year), operating pressure (in
psi), and organizational code of the activity fabricating
the hose assembly. Figure 10-5 shows where this
information is located. All marking of the tag is to be
done prior to its attachment to the hose assembly. Install
the hose assembly identification tag by wrapping the
band snugly around the hose, inserting the tab through
the slot and pulling it tight; crimp the tab after bending
the tab back; and finally, cut away the excess tab after
Figure 10-6.--Hose assembly labels.
crimping. A length of not less than one-half inch must
10-8