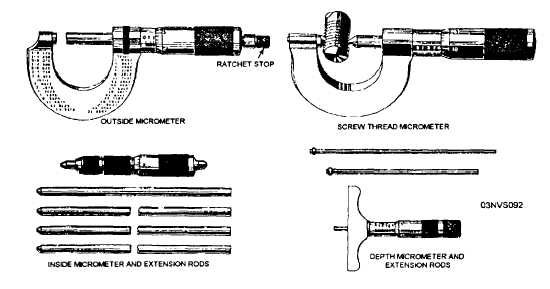
Figure 2-21.—Common types of micrometers.
the point of contact of the two lower caliper legs. In
this figure the inside caliper is being adjusted to the
size of the outside caliper. As careful measurements
with calipers depend on one’s sense of touch, which is
spoken of as “feel,” calipers are best held lightly. When
you notice a slight drag, the caliper is at the proper
setting.
CARE
Keep calipers clean and lightly oiled, but do not
over oil the joint of firm-joint calipers or you may have
difficulty in keeping them tight. Do not throw them
around or use them for screwdrivers or pry bars. Even
a slight force may spring the legs of a caliper so that
other measurements made with it are never accurate.
Remember, calipers are measuring instruments and must
be used only for the purpose for which they are
intended.
PRECISION MEASURING EQUIPMENT
In much wider use by ABEs than even common
calipers are the various types of micrometer calipers. As
was stated earlier, you can use micrometer calipers to
take accurate measurements to the nearest one
ten-thousandth of an inch. However, in most
applications a
measurement to
the
nearest
one-thousandth of an inch is considered acceptable
accuracy. These measurements are expressed or written
as a decimal (0.0001, 0.001, 0.01), so you must know
how to read and write decimals.
TYPES OF MICROMETER CALIPERS
There are three types of micrometer calipers,
commonly called micrometers or simply mikes, used
throughout the Navy: the outside micrometer, including
the screw thread micrometer; the inside micrometer; and
the depth micrometer. (See fig. 2-21.) The outside
micrometer is used for measuring outside dimensions,
such as the outside diameter of a piece of round stock
or the thickness of a piece of flat stock. The screw
thread micrometer is used to determine the pitch
diameter of screws. The inside micrometer is used to
measure the inside diameter of a cylinder or hole. The
depth micrometer is used for measuring the depth of a
hole or recess.
Outside Micrometer
The nomenclature of an outside micrometer is
illustrated in figure 2-22.
The sleeve and thimble scales of a micrometer (fig.
2-23) have been enlarged and laid out for
demonstration. To understand these scales, you need to
know that the threaded section on the spindle, which
revolves, has 40 threads per inch. Therefore, every time
the thimble completes a revolution, the spindle
advances or recedes 1/40 inch, or 0.025 inch.
Note the horizontal line on the sleeve is divided
into 40 equal parts per inch. Every fourth graduation is
2-8


