link. This was done to prevent the torquing
from being missed if you were only per-
forming one of the many operations that
require you to remove and replace the yoke
and plate. If you have performed all the
operations described, then, at this time, you
do the final torquing before the suspension
lines are placed into the container. There-
fore, it is very important that you complete
this process in the following manner and have it
inspected.
Remove the yoke and plate assembly on the
outboard top connector link located on the
helper’s side. Insert the connector link bar through
the loop in the firing lanyard and reattach the
yoke and plate assembly. Tighten the screw to a
torque value of 20 to 25 pound-inches. Apply a
tamper dot to the connector link screwhead using
lacquer (TT-L-32, color 11136, insignia red or
equivalent).
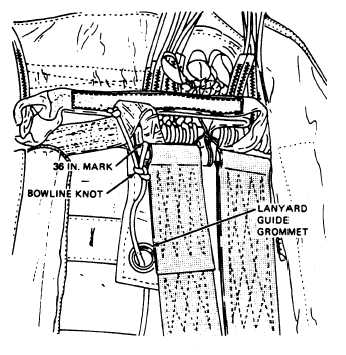
Figure 3-33.—Reeving release lanyard.
As you have read this chapter on the NES-12,
you may have noticed that each time you have
removed the yoke and plate assembly from the
connector link, you have been told to tighten and
torque the screw when reassembling the connector
At this point, you have completed the
rigging and you are ready for the packing
procedure.
When actually performing any of these
procedures, you should refer to the NAVAIR
13-1-6.2 and NAVAIR 13-600-4-6-3. Also, you
will find that some of your rating exam questions
will be taken from these NAVAIR manuals.
3-15