
Figure 16-30.--Inserting cable in swage terminal.
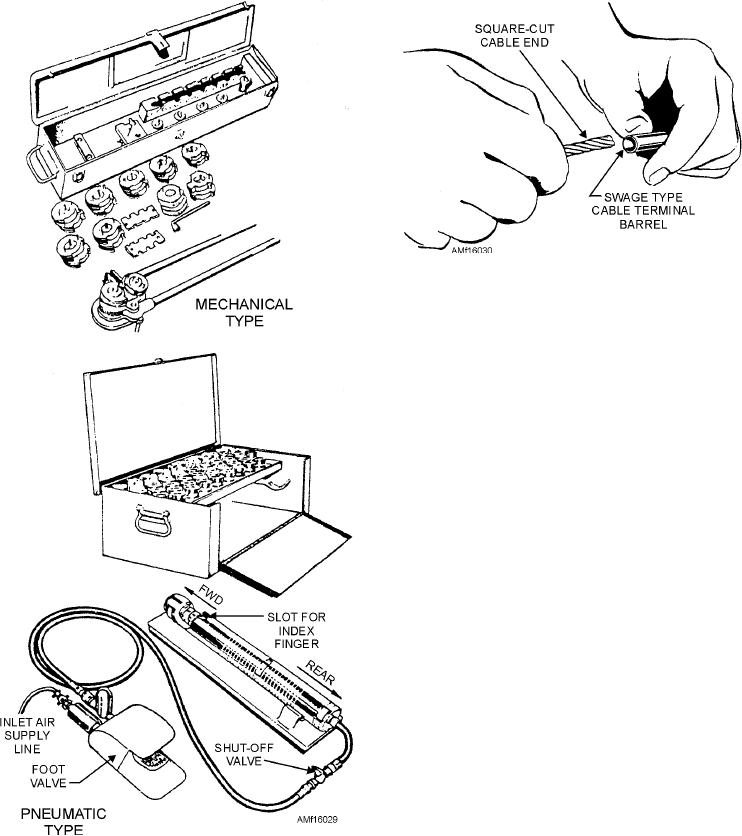
Both of the hand-swaging tools shown in figure
16-29 are widely used by naval aircraft maintenance
activities. When operating the mechanical swaging
tool, you should place the proper size pair of dies on the
swaging tool. The terminal is then located in the jaws
of the tool, as shown in figure 16-31, and the swaging
operation is performed. As the dies rotate, they pull the
terminal from right to left. The dies compress the
terminal barrel onto the cable, and swaging occurs.
Rotation of the dies is accomplished by opening and
closing the handles.
After completion of swaging and removal of the
fitting from the swaging tool, measure the outside
diameter of the shank with a micrometer or with the
gauge furnished with the swaging outfit to determine
whether or not the terminal has been swaged
sufficiently. This may be determined by checking the
measurement with the applicable cable terminal table
in NAVAIR 01-1A-8.
The pneumatic swaging tool shown in figure 16-29
is a lightweight portable unit designed to precision
swage the metal of a terminal into the interstices
(crevices) of the cable strands. The swager may be
mounted on a baseplate and used on a bench, or it can
be taken to the job. When the swaging tool is taken to
the location of the job, it may be held in your hand or
cradled in your arm.
Figure 16-29.--Hand-swaging tools--mechanical and
pneumatic.
The pneumatic swaging kit has several different
sizes and types of dies used for swaging
cable toward the terminal, straighten it back to the
ball-and-sleeve terminals and for cutting and trimming
normal position, and then push the cable all the way
cable. Like the mechanical swaging tool, the dies come
into the terminal barrel. This bending process puts a
in matched sets and must be used together. The dies are
kink in the cable end to hold the terminal in place until
installed by inserting either die through the yoke
the swaging operation is completed. It also tends to
opening into the die cavity. The keyway should be
separate and spread the strands inside the terminal
down and the shank facing the rear of the swager. Slide
the first die back in order to clear the opening for the
barrel and reduces the strain caused by swaging.
16-33